Customer service system
Launch the customer service system: accounts, teams, inbox, and CRM
Configure a minimal WslinkDesk team workflow so messages have owners, handoffs retain context, and customer state remains traceable.
Recommended order: create teams and members, connect accounts, verify messaging, and only then add assignment, customer stages, templates, and AI.
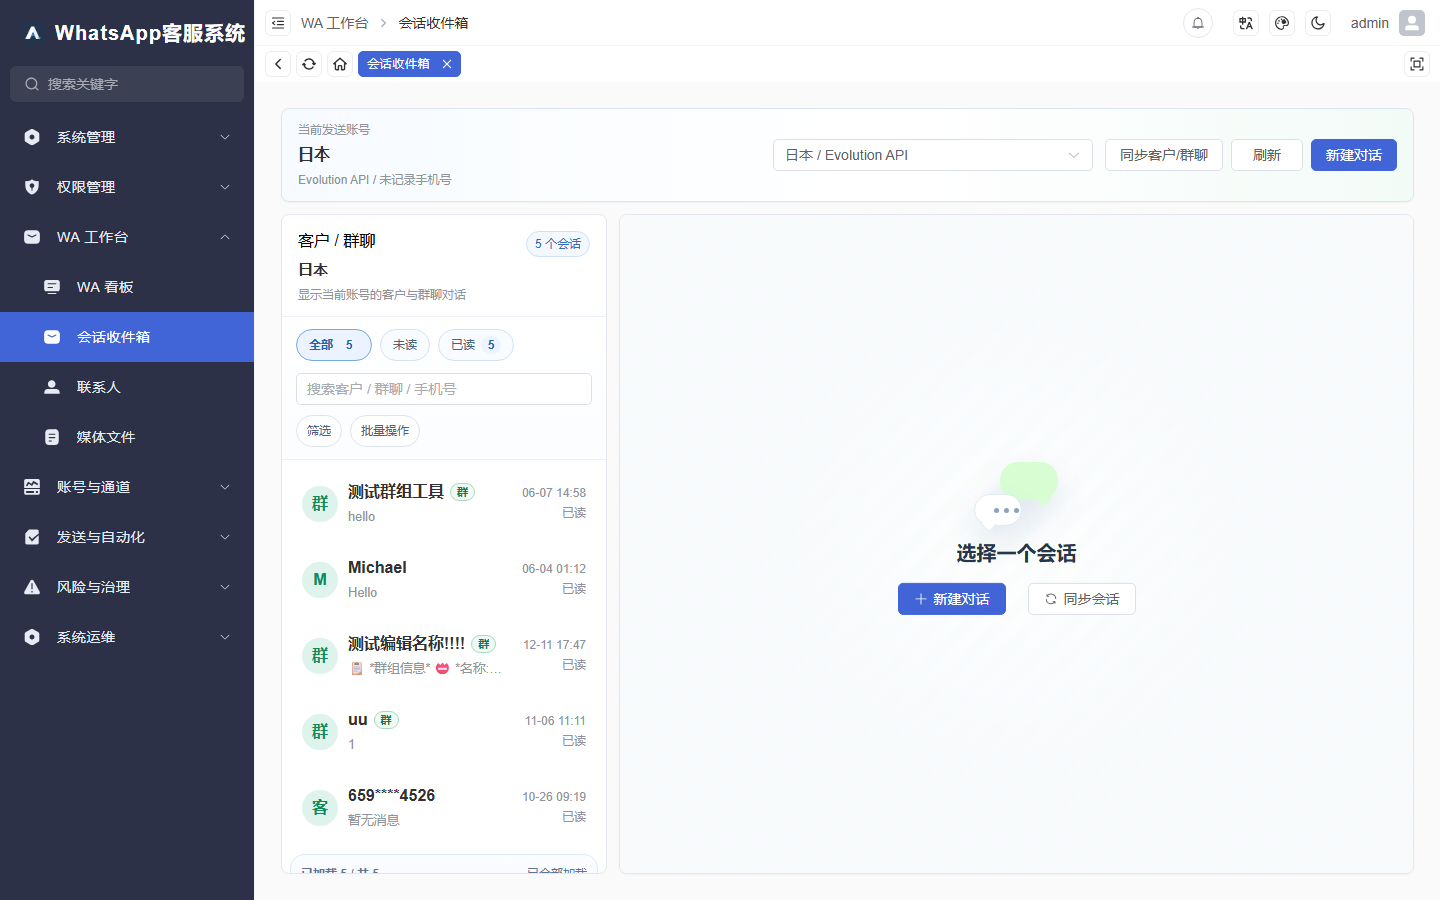
Figure 1: The shared inbox keeps the sending account, conversations, and chat workspace on one screen.
1. Prepare administrators and members
Define which accounts each member can see, which actions they can perform, and who manages team settings. Do not give every member all account and administrative permissions by default.
At minimum, distinguish administrators, supervisors, and support or sales agents. If a member cannot see a menu or account, check permissions and account scope before recreating data.
2. Create team groups
Use Team groups for real responsibility boundaries such as presales, after-sales, region, or brand. Avoid temporary names that no one will understand later.
Start with a small pilot group. Verify visibility, assignment, and handoff before adding the full team.
3. Connect WhatsApp accounts
Add one or two pilot accounts in Account management and use the connection method provided for your deployment. For the browser extension channel, continue with Connect the plugin to the customer service system.
After connection, verify the account number, connection state, and page availability. A backend connection can remain online while the WhatsApp page is unavailable; in that state, the system rejects new sends instead of reporting false success.
4. Verify the shared inbox
In the Inbox, choose the sending account and complete one controlled round trip:
- Send a message from your test contact.
- Confirm that a conversation appears under the correct account.
- Assign an owner.
- Reply from the workspace.
- Confirm delivery, time, and conversation state.
For multi-agent use, make sure two agents do not answer the same customer and that a handoff preserves previous context.
5. Maintain useful customer records
Start with fields that change the next action: source, labels, sales stage, owner, notes, and follow-up reminder.
Keep only labels used by filters, assignment, replies, reminders, or reports. A sales stage should imply a clear next action, such as new inquiry, quoted, awaiting payment, won, or after-sales.
6. Add team tools gradually
Once messaging is stable, configure Quick replies and official templates, Sales pipeline and follow-up reminders, AI models and reply policy, translation, and finally governance, notifications, exports, and audit.
Test AI before enabling it. Pricing, promises, refunds, and sensitive decisions should retain human approval.
7. Acceptance checklist
- Every pilot account can send and receive test messages.
- Important conversations have owners and complete handoff context.
- Members see only authorized accounts and actions.
- Customer labels, stages, notes, and reminders persist.
- Delivery failures, connection problems, and permission errors remain visible.